In this blog, I will explain about real-time face detection and capture using OpenCV on Raspberry Pi.
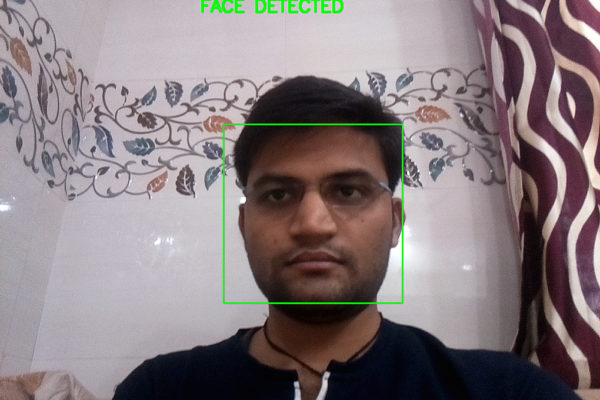
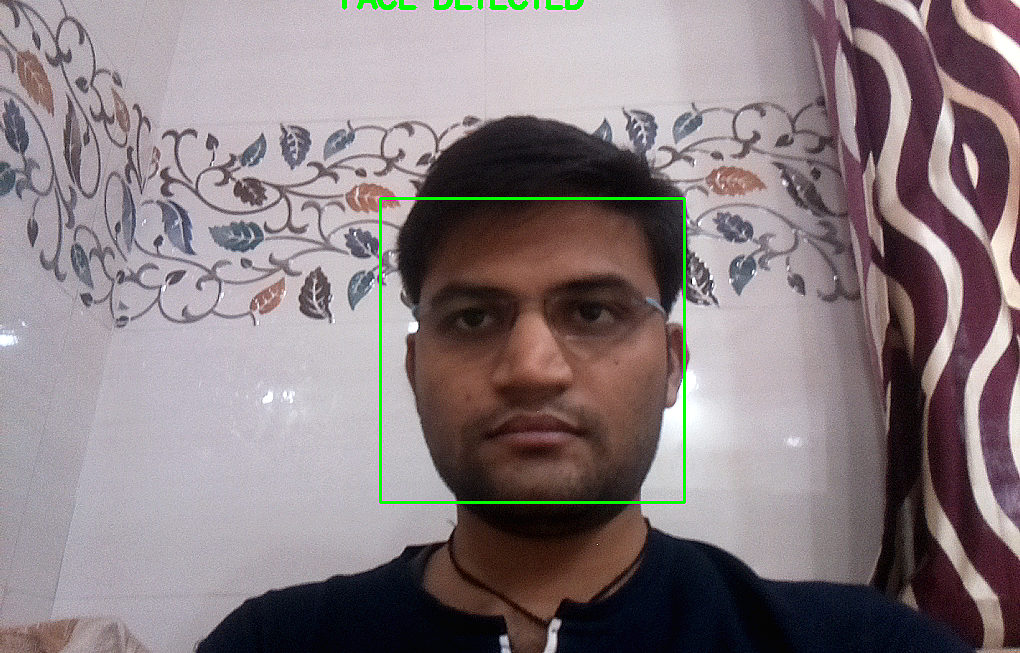
The pi camera attached with a Raspberry Pi capture frame with 32 FPS and if any face detects in real-time video frame then it will capture and save that frame on Raspberry Pi. I am using a pre-trained Opencv Haar cascade classifier model to detect human faces. Opencv pre-trained face detection model trained on many images and accuracy of the model is also very good. If you want to train your own custom Haar cascade classifier model click here.
Here I am using the Following Hardware components.
- Raspberry Pi 4 (4 GB)
- 8MP Raspberry Pi Camera Module v2
Install Opencv on Raspberry Pi.
First Update your Raspberry Pi. Type the following command on your Raspberrypi for an update.
sudo apt-get updateType following command on your Raspberrypi to install all dependencies for OpenCV
sudo apt-get install libhdf5-devsudo apt-get install libhdf5-serial-devsudo apt-get install libatlas-base-devsudo apt-get install libjasper-devsudo apt-get install libqtgui4sudo apt-get install libqt4-testAfter installing all dependencies Now we can install OpenCV on Raspberry Pi
pip3 install opencv-contrib-python==4.1.0.25After installed Opencv we can check OpenCV successfully installed or not
Type following commands in sequences
python3Import OpenCV module
import cv2After Import module if you are not getting any error it means you successfully installed OpenCV
you can check installed OpenCV version Type following command to check OpenCV version
cv2.__version__Type following command for install imutils module for read camera frame
pip3 install imutils
Download Haar cascade classifier model for detect faces.
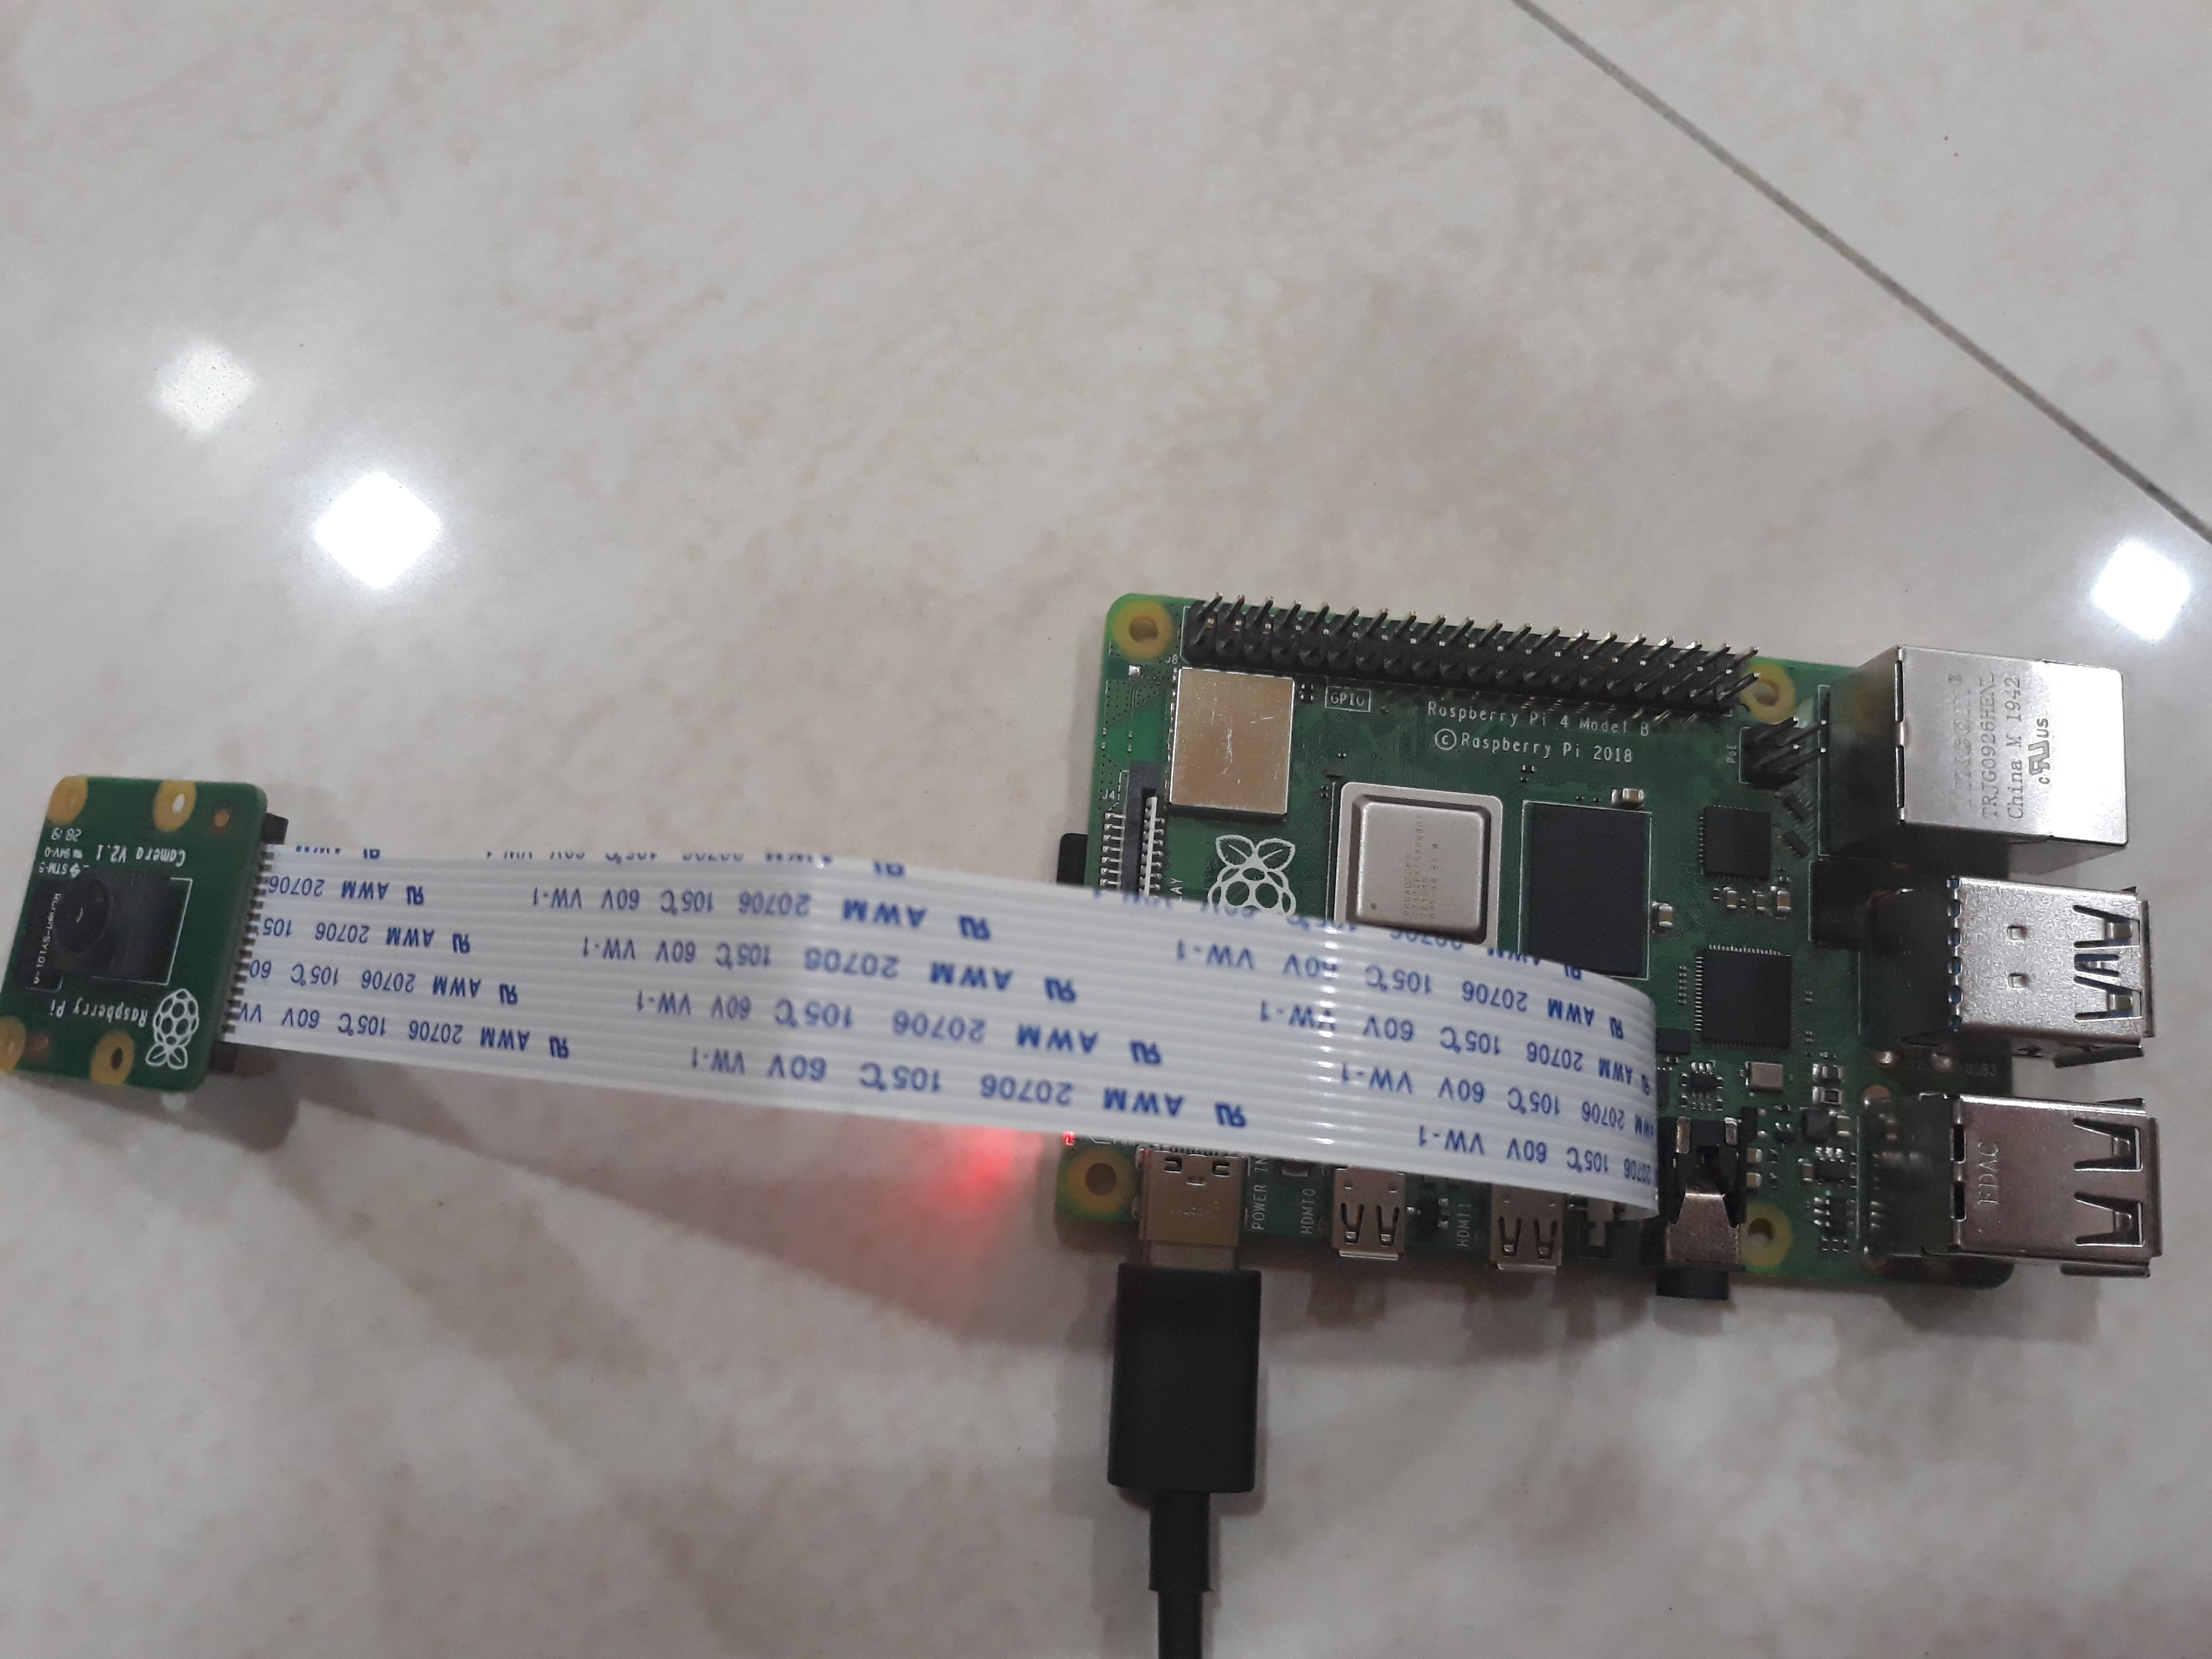
After Installed all libraries connect your pi camera with your Raspberry Pi
Here my setup
After connecting your camera Run the following code
sudo python3 face.py
face.py
import cv2
from imutils.video import VideoStream
import time

# Haarcascade classifier modle for detect face
face_cascade = cv2.CascadeClassifier('./model/haarcascade_frontalface_default.xml')

# Using Pi Camera
PiCamera = True

# Set initial frame size.
frameSize = (1020, 720)

# Setup video stream
vs = VideoStream(src=0, usePiCamera=PiCamera, resolution=frameSize,framerate=32).start()

# Allow camera to setup.
time.sleep(2.0)
i = 0

while 1:
    # Read Video steram
    img = vs.read()
    # Convert frame into grayscale
    gray = cv2.cvtColor(img, cv2.COLOR_BGR2GRAY)
    # Find faces in frame
    faces = face_cascade.detectMultiScale(gray, 1.3, 5)

    if len(faces) == 0:
        # render a message on frame with no face detected
        cv2.putText(img, "NO FACE DETECTED", (340, 40), cv2.FONT_HERSHEY_SIMPLEX, 1, (0, 0, 255), 4,cv2.LINE_AA)
    else:
        # render a message on frame with face detected
        cv2.putText(img, "FACE DETECTED", (340, 40), cv2.FONT_HERSHEY_SIMPLEX, 1, (0, 255, 0), 4,cv2.LINE_AA)
        for (x,y,w,h) in faces:
            # Draw rectangle around every detected face
            cv2.rectangle(img,(x,y),(x+w,y+h),(0,255,0),2)
            #roi_gray = gray[y:y+h, x:x+w]
            #roi_color = img[y:y+h, x:x+w]
            # Save the captured image with detected face
            cv2.imwrite(str(i)+'.png', img)
            i = i+1
    # Show result
    cv2.imshow('img',img)
    k = cv2.waitKey(30) & 0xff
    if k == 27:
        break

cap.release()
cv2.destroyAllWindows()
Github Repository
https://github.com/kamlesh545/Real-Time-Face-Detection-With-Raspberry-Pi
Hope you enjoyed my blog and learned something new 🙂